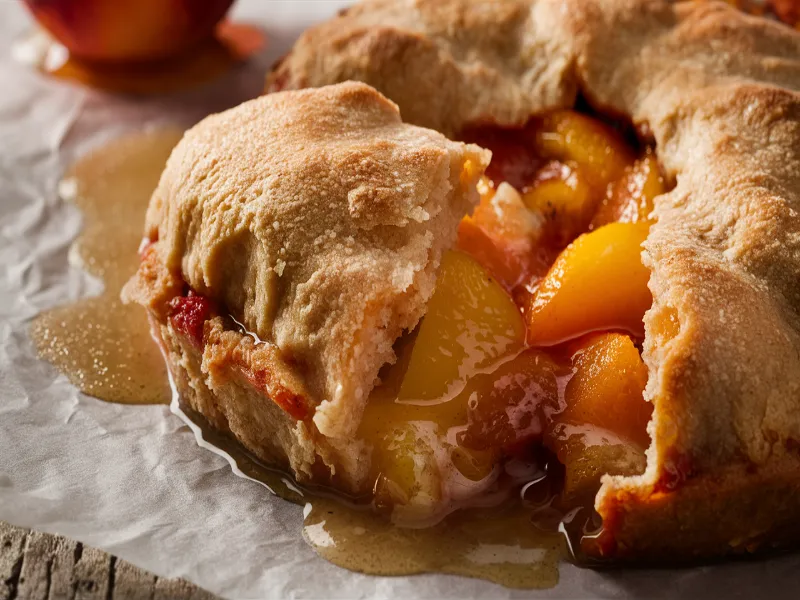
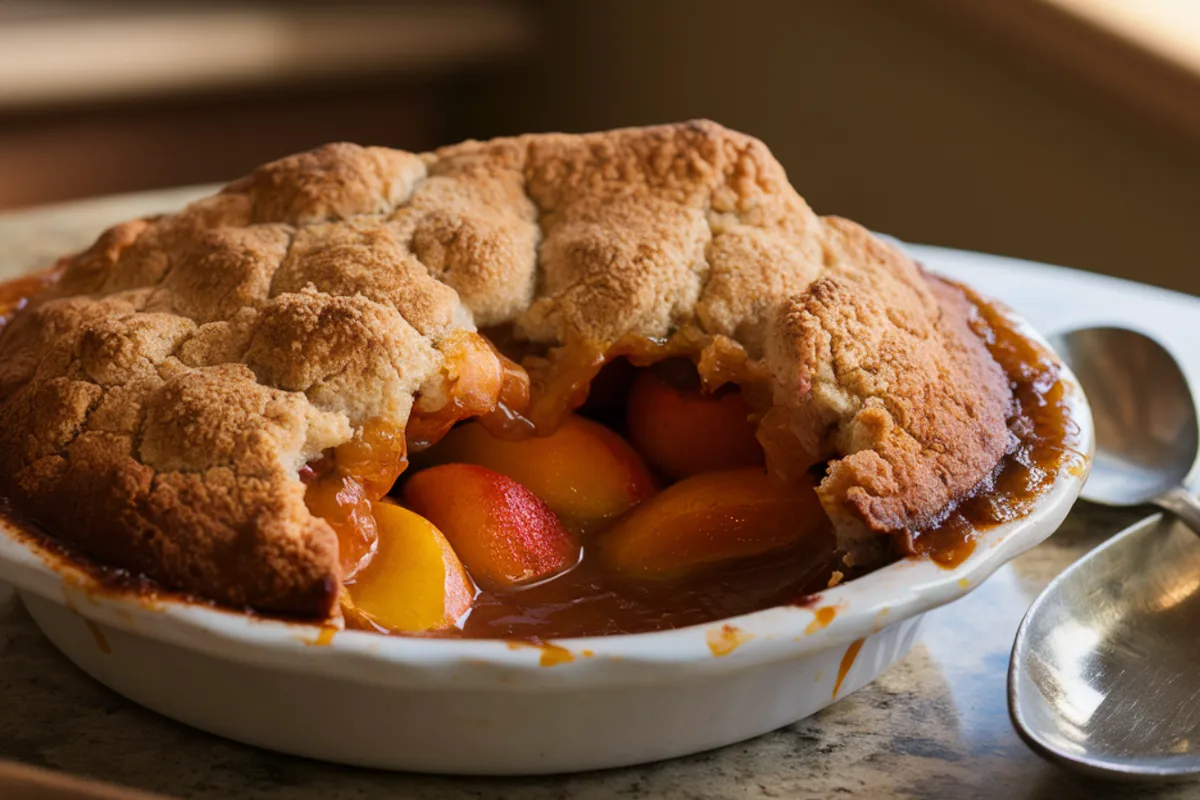
Peach cobbler is a beloved dessert, especially in the Southern United States, where it is a staple at family gatherings, potlucks, and summer barbecues. A perfect peach cobbler boasts a juicy, flavorful filling topped with a golden, flaky crust, but nothing is more disappointing than dealing with a soggy peach cobbler crust. However, achieving that ideal crust can be challenging, and one of the most common complaints is a soggy crust. If you’ve ever wondered why your peach cobbler crust turns out soggy and how to prevent it, this comprehensive guide will cover everything you need to know.
Understanding the Problem: Why Does the Crust Get Soggy?

To solve the problem of a soggy peach cobbler crust, it’s important to first understand why it happens. Different things like what you use, how you make it, and how you cook it can all affect a crust.
Excess Moisture from the Filling: Peaches, the star ingredient in peach cobbler, contain a lot of water. During baking, the water releases and can easily seep into the crust, making it soggy. If the filling is too wet, or if there isn’t enough thickener in the filling, the juices can overwhelm the crust.
Undercooked Crust: If the cobbler isn’t baked long enough, the crust won’t have a chance to fully cook and develop a crisp, golden texture. This can leave you with a crust that is doughy or soggy instead of flaky and crisp.
Improper Layering: The way the ingredients are layered can also impact the final texture of the crust. If you place the crust directly on top of the filling without any separation, it may absorb too much moisture from the peaches.
Oven Temperature: The temperature at which you bake your cobbler can affect how the crust turns out. If the oven temperature is too low, the crust may not cook through properly, resulting in a soggy bottom. On the other hand, if the temperature is too high, the top may brown too quickly while the inside remains undercooked.
Storage and Reheating: Even if your cobbler comes out of the oven perfectly crispy, improper storage and reheating can cause the crust to become soggy. If the cobbler is covered too tightly or not stored properly, moisture can accumulate and soften the crust.
For more on achieving the perfect dessert texture, you might find our Tips for Baking a Perfect Cheesecake helpful.
Choosing the Right Ingredients

The ingredients you choose for your peach cobbler can significantly impact the texture of the crust. Here’s how to select the best ingredients to avoid a soggy crust:
Peaches:
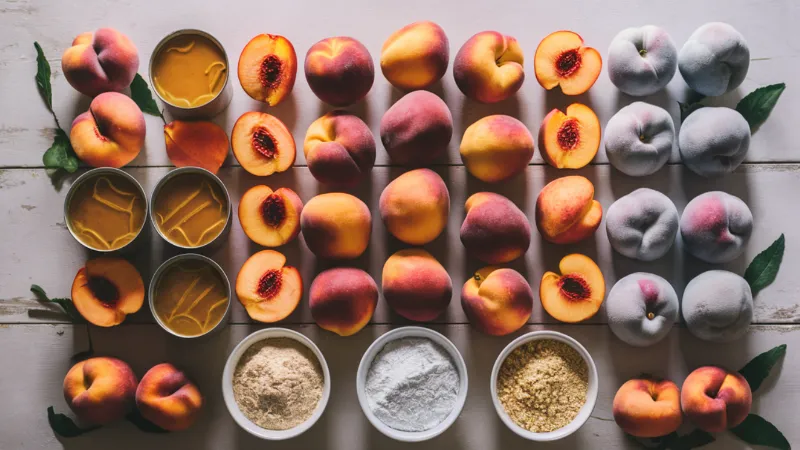
Fresh, ripe peaches are ideal for cobbler because they have the best flavor and texture. However, fresh peaches can be quite juicy, so it’s important to manage the moisture content.
- Fresh Peaches: When using fresh peaches, consider slicing them and letting them sit with sugar for a few minutes. This will draw out some of the juice, which you can drain off before adding the peaches to the cobbler.
- Canned Peaches: If using canned peaches, make sure to drain them thoroughly. Opt for peaches packed in juice rather than syrup to reduce the sugar content and excess moisture.
- Frozen Peaches: Frozen peaches can also be used, but they should be thawed and drained to prevent excess water from affecting the crust.
If you’re curious about other fruit options for desserts, our article on Frozen vs. Canned Peaches for Cobbler offers a detailed comparison.
Thickeners:
Thickeners are crucial for controlling the moisture in the filling and preventing it from making the crust soggy. Cornstarch, flour, and tapioca starch are all good options.
- Cornstarch: Cornstarch is a popular choice because it thickens the filling without altering the flavor. Mix it with the sugar and peaches before baking to ensure even distribution.
- Flour: Flour is another option, but it can sometimes leave a slightly cloudy appearance in the filling. Use it sparingly and combine it well with the other ingredients.
- Tapioca Starch: Tapioca starch is excellent for thickening fruit fillings, as it creates a clear, glossy finish. Particularly good for juicy fruits like peaches.
Sugar:
The amount of sugar you use can also impact the crust. Too much sugar can cause the filling to become too watery as it draws out the moisture from the peaches. Use just enough sugar to sweeten the fruit without overpowering it.
Fat for the Crust:
The type of fat used in the crust can influence its texture and help prevent a soggy peach cobbler crust. Butter is the traditional choice, providing a rich flavor and a tender, flaky texture. For a crispier crust, you can also use a combination of butter and shortening.
- Butter: Use cold, unsalted butter cut into small pieces. The cold butter will create pockets of steam as it bakes, leading to a flaky texture.
- Shortening: Shortening can be used in combination with butter for a crust that is both tender and crisp. It has a higher melting point than butter, which can help the crust maintain its structure.
Perfecting the Preparation Process

How you prepare the ingredients and assemble your peach cobbler can greatly affect the final texture of the crust. Follow these steps to ensure a crisp, golden crust:
Pre-Cooking the Filling:
One of the best ways to prevent a soggy crust is to pre-cook the filling. This step reduces moisture content before adding the filling to the cobbler.
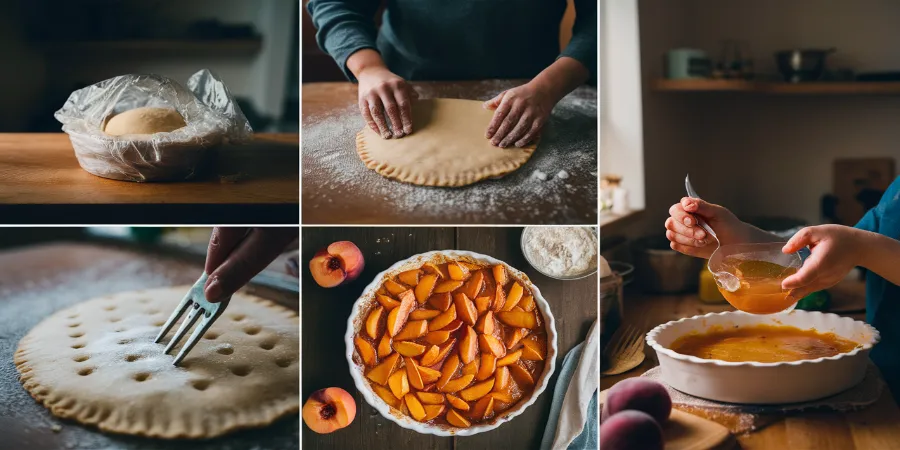
- Cook on the Stovetop: Combine the peaches, sugar, and thickener in a saucepan and cook over medium heat until the mixture thickens. This usually takes about 5-10 minutes. Once thickened, let the filling cool slightly before adding it to the baking dish.
- Drain Excess Liquid: If the filling still seems too watery after cooking, use a slotted spoon to transfer the peaches to the baking dish, leaving any excess liquid behind.
To explore different approaches to cobbler-making, you may also enjoy our Peach Cobbler Egg Rolls recipe, which offers a unique twist on the classic dessert.
Preparing the Crust:
Carefully prepare the crust to ensure it bakes up crisp and flaky.
- Chill the Dough: If you’re making a pastry-style crust, chill the dough before rolling it out. Cold dough is easier to work with and will result in a flakier texture.
- Roll Out Evenly: Roll the dough out to an even thickness, usually about 1/4 inch. An uneven crust can lead to some areas being undercooked while others become too dark.
- Dock the Dough: Docking the dough (pricking it with a fork) before baking can help prevent it from puffing up unevenly and allows steam to escape, reducing the chances of a soggy bottom.
Layering the Cobbler:
How you layer the ingredients in your cobbler can make a big difference in the final product.
- Bottom Crust Option: Some recipes include a bottom crust, which can add an extra layer of texture. If using a bottom crust, pre-bake it partially before adding the filling to help it stay crisp.
- Top Crust Only: Most traditional cobblers have only a top crust. When adding the crust, lay it gently over the filling and press the edges to seal them against the sides of the baking dish. This helps keep the filling from leaking out and softening the crust.
Mastering the Baking Process
The baking process is where the magic happens, and getting it right is key to avoiding a soggy crust. Here are some tips to ensure your cobbler bakes to perfection:
Preheat the Oven: Always start with a fully preheated oven. A hot oven helps the crust set quickly, preventing the filling’s moisture from seeping in.
Baking Temperature: Bake the cobbler at a temperature of 375-400°F (190-200°C). This range is ideal for cooking the filling while giving the crust time to brown and crisp up. If the crust is browning too quickly, cover it with foil to prevent burning while the filling continues to cook.
Use the Right Baking Dish: The type of baking dish you use can also impact the outcome. Glass or ceramic dishes are preferred because they distribute heat evenly. Metal pans can cause the crust to brown too quickly, leading to an undercooked filling.
Bake on a Lower Rack: Position the baking dish on a lower rack in the oven. This helps the bottom crust, if you’re using one, to bake more thoroughly and prevents it from becoming soggy.
Check for Doneness: The cobbler is done when the filling is bubbly, and the crust is golden brown. Insert a toothpick or knife into the center of the crust; if it comes out clean, the cobbler is ready. If the crust is still doughy in the center, give it a few more minutes in the oven.
Resting Time: Allow the cobbler to rest for 10-15 minutes after baking. This gives the filling time to set and reduces the likelihood of the crust becoming soggy when cut.
If you’re interested in other traditional Southern desserts, check out our guide on The Best Banana Bread, which also focuses on perfecting textures.
Proper Cooling and Storage
Even if your cobbler comes out of the oven perfectly crispy, Improper storage can quickly turn a perfectly crispy crust into a soggy peach cobbler crust. Here’s how to keep it crisp:
Cool on a Wire Rack: After baking, place the cobbler on a wire rack to cool. This allows air to circulate around the baking dish, preventing moisture from accumulating underneath.
Avoid Covering Too Soon: If you cover the cobbler while it’s still warm, steam will get trapped, leading to a soggy crust. Let the cobbler cool to room temperature before covering it with foil or plastic wrap.
Refrigeration: If you need to store the cobbler for later, cover it loosely with foil and refrigerate. Avoid using airtight containers, as they can trap moisture. When ready to serve, reheat the cobbler in the oven to restore its crispness.
Freezing: Peach cobbler can be frozen, but the crust may lose some of its crispness after thawing. To freeze, allow the cobbler to cool completely, then wrap it tightly in plastic wrap followed by a layer of aluminum foil. To reheat, thaw the cobbler in the refrigerator overnight and then warm it in the oven at 350°F (175°C) until heated through.
Common Mistakes and How to Avoid Them
Making peach cobbler isn’t difficult, but there are a few common mistakes that can lead to a soggy crust. Here’s how to avoid them:
1. Using Overly Ripe or Unripe Peaches:
Overly ripe peaches can release too much juice during baking, while unripe peaches might not have enough flavor. Choose peaches that are ripe but still firm to the touch.
2. Skipping the Thickener:
Failing to use a thickener or not using enough can result in a runny filling that seeps into the crust. Always mix a thickener with the filling before baking.
3. Not Draining the Peaches Properly:
Whether you’re using fresh, canned, or frozen peaches, it’s crucial to manage their moisture content. Not draining the peaches properly can introduce excess liquid into the filling, which can lead to a soggy crust. Always drain canned peaches thoroughly and pat fresh or thawed frozen peaches dry with paper towels before using.
4. Overloading the Filling:
While it might be tempting to pack in as many peaches as possible, overloading the filling can cause the juices to overflow during baking, saturating the crust. Stick to the recommended amount of filling for your recipe to maintain a good balance between fruit and crust.
5. Underbaking the Cobbler:
Pulling the cobbler out of the oven too early can result in a crust that hasn’t had enough time to crisp up. Always check for doneness by ensuring the crust is golden brown and fully cooked through. If the top browns too quickly while the inside remains undercooked, cover it with foil and continue baking until the filling bubbles and the crust sets.
6. Improper Storage:
Storing your cobbler while it’s still warm, or in an airtight container, can trap steam and cause the crust to become soggy. Let the cobbler cool completely before covering it, and store it in a way that allows for some air circulation, such as loosely covered with foil.
Advanced Techniques for a Perfect Cobbler Crust
For those looking to perfect their peach cobbler or try something a bit more advanced, here are some techniques that can help elevate your dessert:
Blind Baking the Crust:
If your recipe calls for a bottom crust, consider blind baking it before adding the filling. To blind bake, roll out the dough, place it in the baking dish, and cover it with parchment paper. Fill the dish with pie weights or dried beans to keep the dough from puffing up. Bake the crust at 375°F (190°C) for 10-15 minutes, then remove the weights and parchment and bake for another 5 minutes until the crust is lightly golden. This step helps ensure that the bottom crust stays crispy even after the filling is added.
Egg Wash for a Golden Crust:
Brushing the top crust with an egg wash before baking can help it achieve a beautiful golden color and add a slight sheen. To make an egg wash, simply beat one egg with a tablespoon of water and brush it over the crust before placing the cobbler in the oven.
Sugar Sprinkling:
For added texture and sweetness, sprinkle a light layer of coarse sugar (such as turbinado or sanding sugar) over the top crust before baking. This will create a slight crunch and give the cobbler a professional-looking finish.
Layering Butter in the Crust:
For an extra flaky top crust, try layering small bits of cold butter between the layers of dough as you roll it out. This technique, similar to making puff pastry, creates multiple layers of fat that steam during baking, resulting in a light and flaky crust.
Biscuit-Topped Cobbler:
If you prefer a biscuit-like topping, try making a drop biscuit dough and spooning it over the filling. Biscuit dough typically includes baking powder, which helps it rise and creates a fluffy, tender topping that still maintains some crispness. To keep the biscuits from becoming too soggy, avoid letting them sit in the filling for too long before baking.
Troubleshooting Soggy Crusts
If you’ve followed all the steps above but still find your cobbler crust isn’t as crisp as you’d like, here are some troubleshooting tips:
Cobbler is Too Juicy: If the filling is overly juicy even after pre-cooking and using a thickener, consider reducing the amount of liquid in the filling. For example, if your recipe calls for adding extra juice or liquid to the filling, try reducing it by half or omitting it altogether.
Crust Doesn’t Brown: If your crust isn’t browning enough, it might be due to a low oven temperature or the use of a glass or ceramic baking dish, which doesn’t conduct heat as quickly as metal. Try increasing the oven temperature slightly or baking the cobbler on a higher rack in the oven.
Crust is Too Thick: A thick crust can be difficult to bake through properly, resulting in a doughy texture. Roll out the dough to about 1/4 inch thick, and ensure it’s evenly distributed over the filling for uniform baking.
Filling Leaks Through Crust: If the filling is leaking through the crust, it could be due to tears or holes in the dough. Be gentle when rolling out and transferring the dough to the baking dish, and repair any holes with a bit of extra dough.
Alternative Cobbler Variations
Peach cobbler is a versatile dessert that can be adapted in various ways to suit different tastes and dietary preferences. Here are some variations to consider:
Gluten-Free Cobbler: For those who need a gluten-free option, use a gluten-free flour blend in the crust. There are many high-quality blends available that mimic the texture of regular flour. You can also use almond flour or oat flour for a slightly different texture and flavor.
Vegan Cobbler: To make a vegan peach cobbler, replace the butter in the crust with a plant-based butter or coconut oil. Ensure that any milk used in the dough is non-dairy, such as almond or soy milk. The filling can be sweetened with maple syrup or agave nectar instead of honey.
Whole Grain Cobbler: For a healthier twist, use whole wheat flour or a mix of whole wheat and all-purpose flour in the crust. This adds a bit of nuttiness and increases the fiber content of the dessert.
Spiced Peach Cobbler: Enhance the flavor of your cobbler by adding spices like cinnamon, nutmeg, or ginger to the filling or the crust. Spices can complement the natural sweetness of the peaches and add depth to the dessert.
Savory Peach Cobbler: For a unique twist, try making a savory peach cobbler by adding ingredients like fresh herbs (basil or thyme) to the filling. The crust can also be made with less sugar or omitted altogether in favor of a savory biscuit topping.
Serving and Pairing Suggestions
Once you’ve perfected your peach cobbler, it’s time to think about how to serve it. Here are some ideas for making your cobbler the star of the meal:
Serving Warm vs. Cold: Serve peach cobbler warm, ideally straight from the oven. Enjoy it at room temperature or cold, based on your preference. Pairing it warm with a scoop of vanilla ice cream is a classic, unbeatable combination.
Toppings: Aside from ice cream, there are other delicious toppings you can add to your cobbler:
- Whipped Cream: A dollop of freshly whipped cream adds lightness and complements the richness of the cobbler.
- Yogurt: For a tangy contrast, serve the cobbler with a spoonful of Greek yogurt.
- Caramel Sauce: Drizzle warm caramel sauce over the cobbler for an extra layer of sweetness.
Pairing with Beverages: To elevate your peach cobbler experience, pair it with the right beverage:
- Tea: A cup of black tea, such as Earl Grey, pairs beautifully with the fruity sweetness of peach cobbler.
- Coffee: For a classic pairing, serve the cobbler with a cup of freshly brewed coffee.
FAQs:
1. How do I prevent my peach cobbler crust from becoming soggy?
To prevent a soggy crust, ensure you manage the moisture in the filling by using thickeners like cornstarch or flour, and by pre-cooking the filling. Make sure to fully preheat your oven and bake the cobbler at the correct temperature of 375-400°F. Chilling the dough before baking and allowing the cobbler to rest after baking can also help maintain a crisp crust.
2. Should I pre-bake the crust before adding the filling?
Pre-baking the bottom crust, a technique known as blind baking, can help keep it crispy by preventing the filling’s moisture from soaking in. If your recipe includes a bottom crust, it’s a good idea to pre-bake it for about 10-15 minutes before adding the peach filling.
3. What’s the best type of fat to use in the cobbler crust?
Cold, unsalted butter is the traditional choice for a rich, flaky crust. Shortening can also be used to add tenderness and crispiness, especially when combined with butter. Ensure that the fat is cold to create a flaky texture during baking.
4. Can I use canned or frozen peaches instead of fresh?
Yes, you can use canned or frozen peaches. Just be sure to drain canned peaches thoroughly and thaw and drain frozen peaches to avoid excess moisture, which can lead to a soggy crust. Using peaches packed in juice rather than syrup can also help control the sugar content.
5. How should I store leftover peach cobbler to keep the crust crispy?
Store leftover cobbler loosely covered with foil in the refrigerator. To maintain the crust’s crispiness, reheat the cobbler in the oven rather than the microwave, which can make the crust soggy. Place it in a preheated oven at 350°F (175°C) until warmed through.
Conclusion: Achieving the Perfect Peach Cobbler Crust
Mastering a crispy, flaky peach cobbler crust takes practice, but with the right techniques and patience, you can succeed. By managing the moisture in the filling, choosing the right ingredients, and following careful preparation and baking steps, you’ll be able to avoid the dreaded soggy crust and create a cobbler that’s as delicious as it is beautiful.
Whether making traditional peach cobbler or experimenting, understanding each ingredient’s role is key to success. With the tips and tricks provided in this guide, you’ll be well-equipped to bake a peach cobbler that’s free of a soggy peach cobbler crust and sure to impress.
So the next time you find yourself wondering, “Why is my peach cobbler crust soggy?”, you’ll have all the answers you need to ensure that your cobbler turns out perfectly every time.
Disclaimer: This article is for sharing purposes only, not medical or dietary advice. Always consult a healthcare provider for specific concerns. Nutrition information is estimated as a courtesy; verify with your nutritional calculator for medical use. Percent Daily Values are based on a 2000-calorie diet.
